This is an older version of Search Guard. Switch to Latest version
The Search Guard configuration index
Content
Concepts
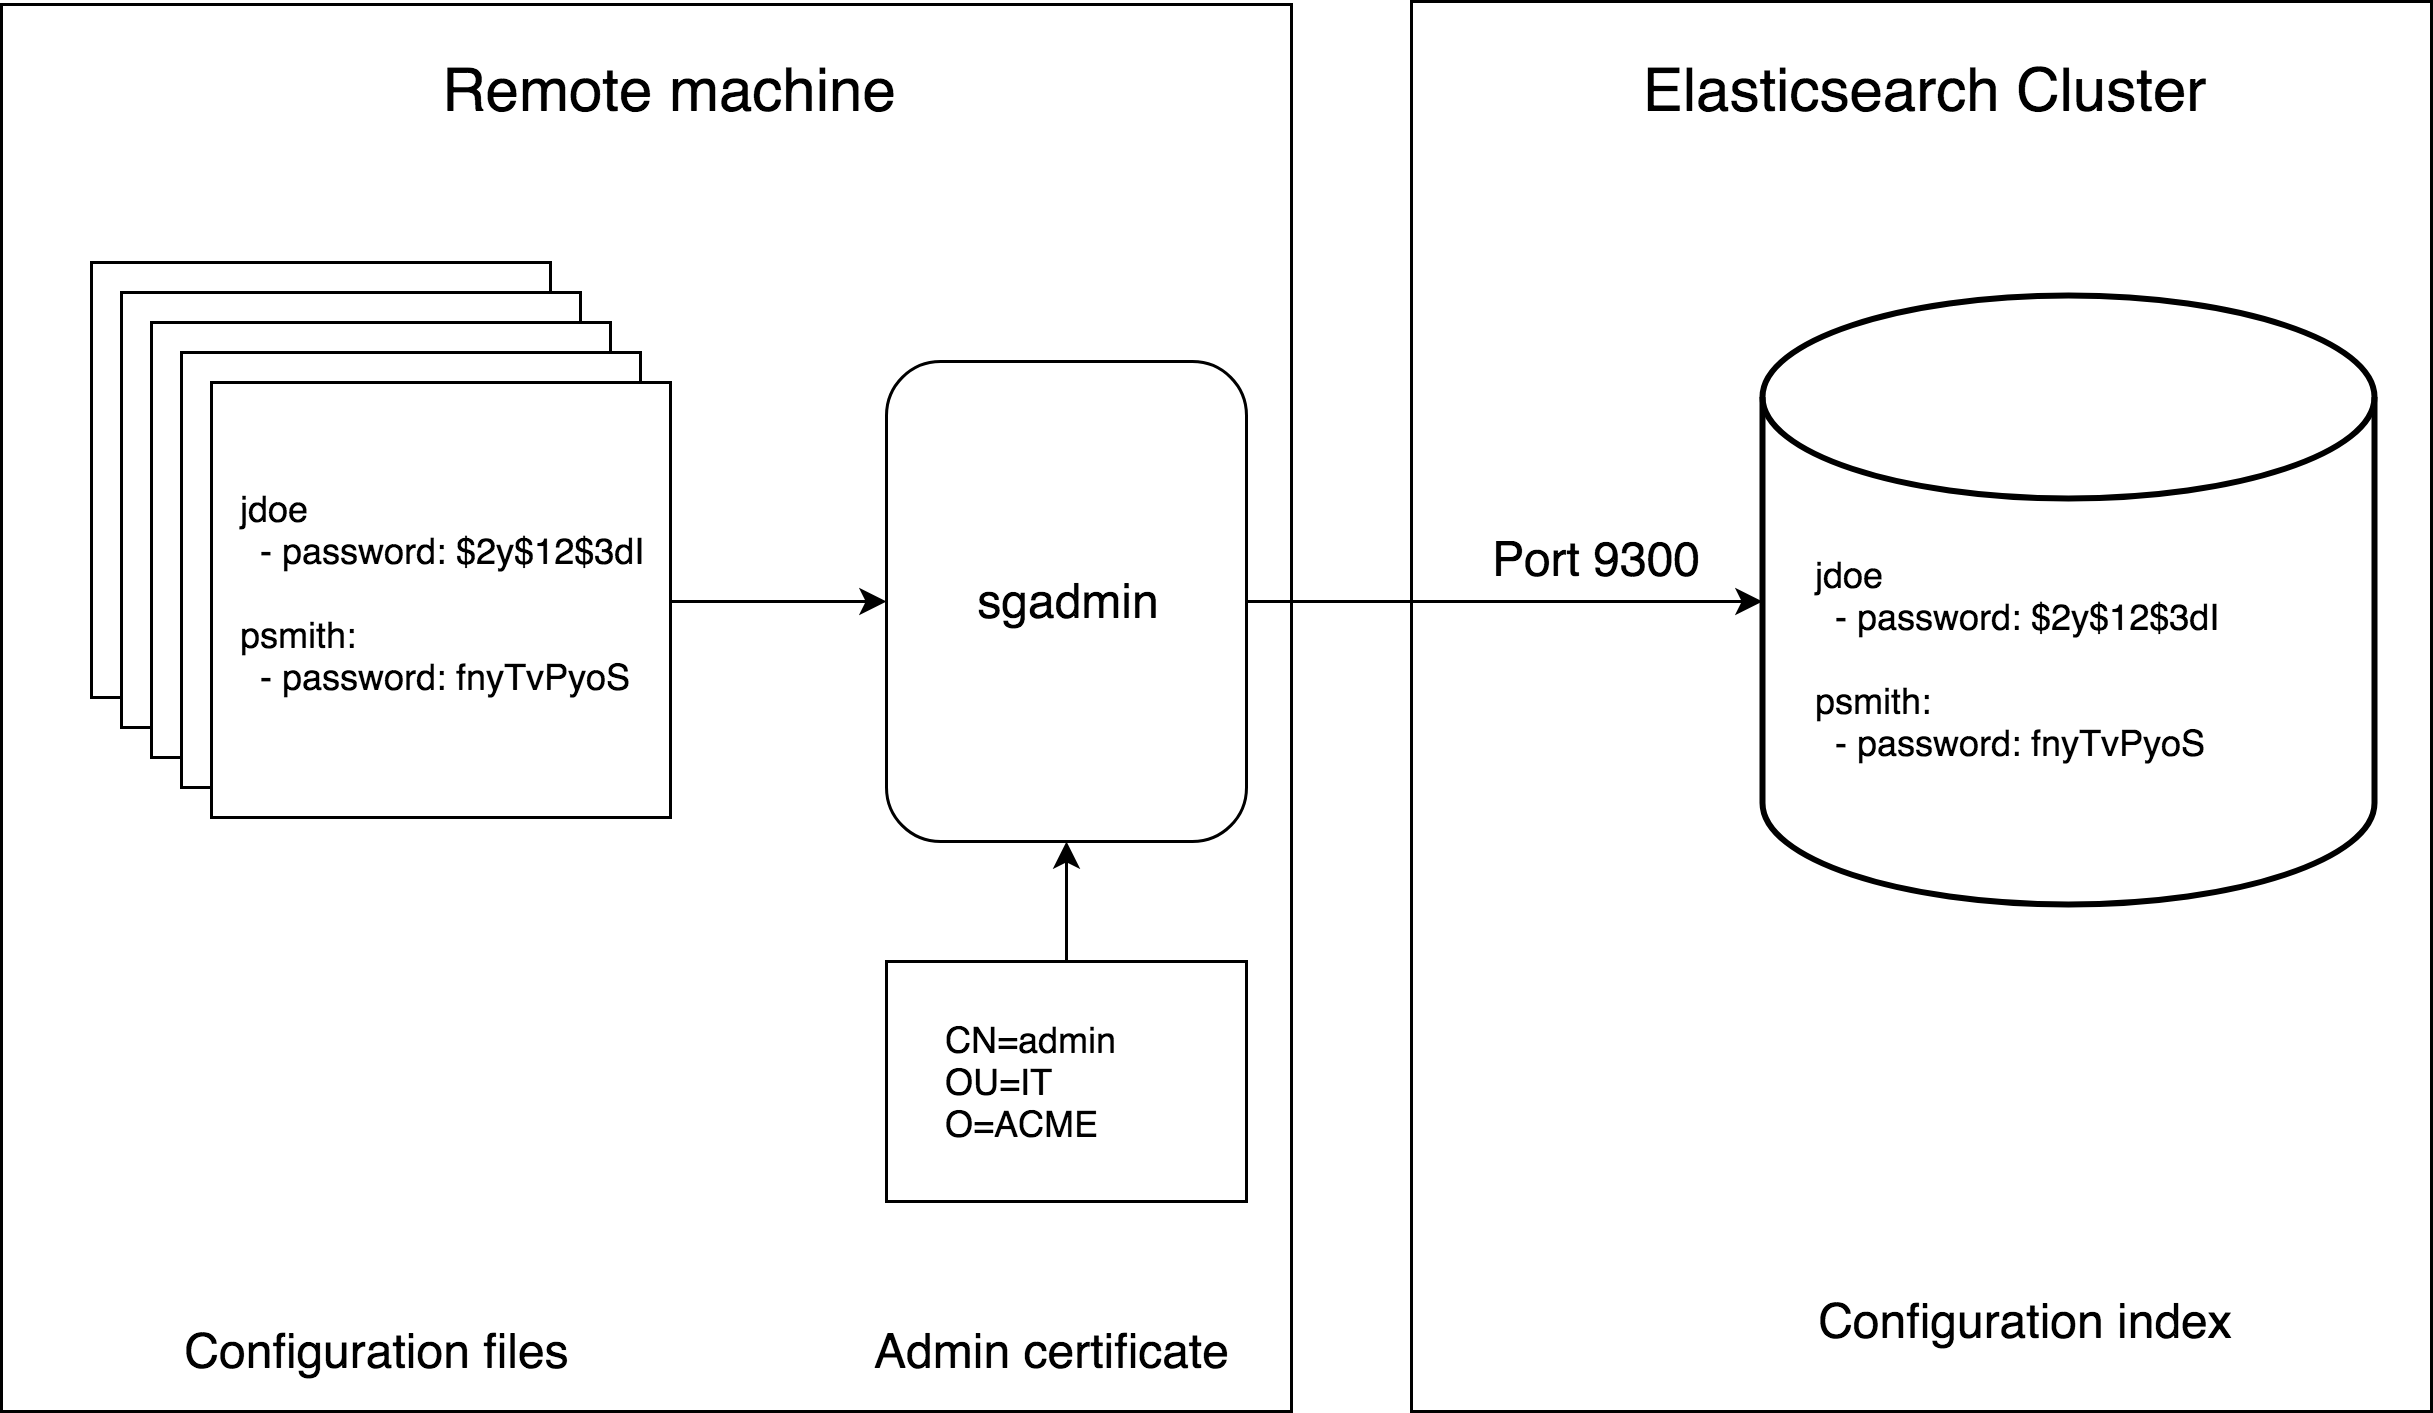
All configuration settings for Search Guard, such as users, roles and permissions, are stored as documents in the Search Guard configuration index.
This index is secured so that only an admin user with an admin TLS certificate may write or read this index. Admin certificates are configured in elasticsearch.yml.
Keeping the configuration settings in an Elasticsearch index enables hot config reloading. This means that you can change any of the user, role and permission or authentication settings at runtime, without restarting your nodes. Configuration changes will take effect immediately.
You can load and change the settings from any machine which has access to your Elasticsearch cluster. You do not need to keep any configuration files on the nodes.
The configuration consists of the following files. These are shipped with Search Guard as templates.
- sg_config.yml - configure authenticators and authorisation backends.
- sg_roles.yml - define roles and the associated permissions.
- sg_roles_mapping.yml - map backend roles, hosts and users to roles.
- sg_internal_users.yml - stores users,and hashed passwords in the internal user database.
- sg_action_groups.yml - define named permission groups.
- sg_tenants.yml - defines tenants for configuring Kibana access
Configuration settings are applied by pushing the content of one or more configuration files to the Search Guard secured cluster by using the sgadmin tool. For details, refer to the chapter sgadmin.
Index name
If nothing else is specified, Search Guard uses searchguard as index name.
You can configure the name of the Search Guard index in elasticsearch.yml by setting:
searchguard.config_index_name: myindexname
Backup and Restore
Use sgadmin to backup the contents of the Search Guard configuration index
Backup the current configuration from a cluster running on staging.example.com and place the files in /etc/sgbackup/:
./sgadmin.sh
  -backup /etc/sgbackup/  \
  -h staging.example.com  \
  -cacert /path/to/root-ca.pem  \
  -cert /path/to/admin.pem  \
  -key /path/to/admin-key.pem
To upload the dumped files to another cluster, here production.example.com listening on port 9301, use:
./sgadmin.sh
  -cd /etc/sgbackup/  \
  -h production.example.com  \
  -p 9301 \
  -cacert /path/to/root-ca.pem  \
  -cert /path/to/admin.pem  \
  -key /path/to/admin-key.pem
Replica shards
Search Guard manages the number of replica shards of the Search Guard index automatically. If the Search Guard index is created for the first time, the number of replica shards is set to the number of nodes - 1. If you add or remove nodes, the number of shards will be increased or decreased automatically. This means that a primary or replica shard of the Search Guard index is available on all nodes.
If you want to manage the number of replica shards yourself, you can disable the replica auto-expand feature by using the -dra switch of sgadmin. To set the number of replica shards, use sgadmin with the -us switch. To re-enable replica auto-expansion, use the -era switch. See also section “Index and replica settings” in the sgadmin chapter.
Note that the -us, -era and -dra only apply if there is an existing Search Guard index.
Disable auto expand replicas of the searchguard index
There are several situations where the auto-expand feature is not suitable including:
- When using a Hot/Warm Architecture
- Running multiple instances of Elasticsearch on the same host machine
- When
cluster.routing.allocation.same_shard.hostis set tofalse, see also elastic/elasticsearch#29933 - The searchguard index stays constantly yellow
To solve this disable the auto-expand replicas feature of the searchguard index and set the number of replicas manually. You can also keep the auto-expand replicas feature and set it to “0-n” where n is the number of datanodes-2.