This is an older version of Search Guard. Switch to Latest version
Multitenancy
Content
Overview
Kibana does not support multi tenancy out of the box. This means that all stored objects, such as dashboards, visualizations and saved searches are stored in a global Kibana index.
This index is configured in kibana.yml:
kibana.index: ".kibana"
Kibana uses the Kibana server user to read and write from this index. The Kibana server user is also configured in kibana.yml:
elasticsearch.username: "kibanaserver"
elasticsearch.password: "kibanaserver"
This means that regardless of the permissions a user has, he or she will be able to see and modify all dashboards and visualizations.
In case the user does not have permissions to access the underlying index of a visualization, the visualization will simply be blank and a security exception is logged in Elasticsearch.
The Kibana multitenancy module brings true separation of stored objects based on the configured tenants of a user’s role.
Tenants: Definition
A Kibana tenant is a named container for storing saved objects. A tenant can be assigned to one or more Search Guard roles. The role can have read-write or read-only access to the tenant and thus the saved objects in it. A Kibana user selects the tenant that he or she wants to work with. Search Guard ensures that the saved objects are placed in the selected tenant.
Any Kibana user always has access to two preconfigured tenants: Global and Private.
The Global tenant is shared with every user. This is the default tenant if no other tenant is selected. You’ll find objects that you have created before installing the multi tenancy module there.
The Private tenant is not shared. It is only accessible for the currently logged in user.
Installation and configuration
In order for multitenancy to work, you need to configure:
- Elasticsearch: Search Guard and the Kibana multitenancy enterprise module (automatically installed).
- Kibana: the Search Guard Kibana plugin.
Multi tenancy will not work properly if you install only one of the modules or plugins, or if the configuration does not match in Elasticsearch and Kibana.
Elasticsearch: Configuration
Multi tenancy is configured in sg_config.yml:
searchguard:
  dynamic:
    kibana:
      multitenancy_enabled: true
      server_username: 'xxx'
      ...
    http:
      anonymous_auth_enabled: false
      xff:
        enabled: false
        ...
The following configuration keys are available:
| Name | Description |
|---|---|
| searchguard.dynamic.kibana.multitenancy_enabled | boolean, enable or disable multi tenancy. Default: true. |
| searchguard.dynamic.kibana.server_username | String, the name of the Kibana server user as configured in your kibana.yml. The names must match in both configurations. Default: kibanaserver. |
| searchguard.dynamic.kibana.index | String, the name of the Kibana index as configured in your kibana.yml. The index name must match in both configurations. Default: .kibana. |
| searchguard.dynamic.kibana.do_not_fail_on_forbidden | boolean, if enabled Search Guard will remove content from the search result a user is not allowed to see. If disabled, a security exceptions is returned. Default: false. |
Adding tenants
If you do not configure anything special, every user has access to the Global and Private tenant by default, with read/write access.
You can define an arbitrary number of additional tenants per Search Guard role in sg_roles.yml, for example:
sg_human_resources:
  cluster:
    ...
  indices:
    ...
  tenants:
    human_resources: RW
    human_resources_readonly: RO
In this example, a user that has the role sg_human_resources has access to the tenant human_resources with read/write access, and read-only access to the tenant human_resources_readonly.
Kibana: Plugin Configuration
Enable the multi tenancy feature in kibana.yml by adding:
searchguard.multitenancy.enabled: true
In addition, Kibana requires you to whitelist all HTTP headers that should be passed from Kibana to Elasticsearch. The multi tenancy feature uses one specific header, named sgtenant. Add this header and also the standard Authorization header to the white list. If the sgtenant header is not whitelisted, an error message is logged on startup and the status of Kibana will be red.
elasticsearch.requestHeadersWhitelist: ["sgtenant", "Authorization", ...]
(If you use Search Guard authentication modules other than Basic Authentication, for example Proxy Authentication, the required HTTP headers may vary.)
Check that the Kibana server user and the Kibana index name matches in both kibana.yml and sg_config. The contents of the following keys must match:
Kibana server user:
kibana.yml: elasticsearch.username
sg_config: searchguard.dynamic.kibana.server_username
Kibana index name:
kibana.yml: kibana.index
sg_config: searchguard.dynamic.kibana.index
Kibana: Tenant Configuration
By default, Search Guard offers two default tenants for each user, Global and Private. The Global tenant is shared between all users and uses the Kibana index as configured in kibana.yml. Thus, all dashboards and visualizations that have been created prior to installing multi tenancy can be found in this tenant.
The Private tenant is meant as a user’s private space, thus is not shared.
You can enable and disable these tenants by the following kibana.yml configuration keys:
| Name | Description |
|---|---|
| searchguard.multitenancy.tenants.enable_global | boolean, enable or disable the global tenant. Default: true. |
| searchguard.multitenancy.tenants.enable_private | boolean, enable or disable the private tenant. Default: true. |
Note that each user needs to have at least one tenant configured, otherwise Search Guard does not know which tenant to use. If you disable both the Global and Private tenant, and the user does not have any other tenants configured, login will not be possible.
Kibana: Setting preferred / default tenants
If a user logs in the first time and has not chosen a tenant yet, Search Guard will
- collect all available tenants for the logged in user
- sort them alphabetically
- if enabled, add the global and private tenant on top
- choose the first tenant from this list
If you want to change the way Search Guard selects the default tenant, configure the preferred tenants in kibana.yml:
searchguard.multitenancy.tenants.preferred: ["tenant1","tenant2",...]
Search Guard will compare the list of preferred tenants with the list of available tenants for the logged in user, and chose the first matching tenant.
Kibana: Selecting tenants by query parameter
Tenants can also be switched by adding a query parameter to the URL. This is especially handy if you want to share a visualization or dashboard.
For any Kibana URL, you can add a query param sgtenant which will overwrite the currently selected tenant.
http://localhost:5601/app/kibana?sgtenant=mytenant#/visualize/edit/919f5810-55ff-11e7-a198-5f6d82ac1c15?_g=()
Make sure to add the the query parameter before the hash sign.
Using the Kibana API
Kibana offers an API for saved objects like index patterns, dashboards and visualizations. In order to use this API in conjunction with tenants, specify the tenant by adding the sgtenant HTTP header:
curl \
   -u hr_employee:hr_employee \
   -H "sgtenant: management" \
   -H 'Content-Type: application/json' \
   -H "kbn-xsrf: true" \
   -XGET "http://localhost:5601/api/saved_objects"
Filter bar for tenants
If you have a huge amount of tenants, the tenant list can get long. You can use a filter bar to quickly filter the tenants list. Enable it in kibana.yml:
searchguard.multitenancy.enable_filter: true
Which will display a filter bar in the top navigation of the page:
Selecting tenants in Kibana
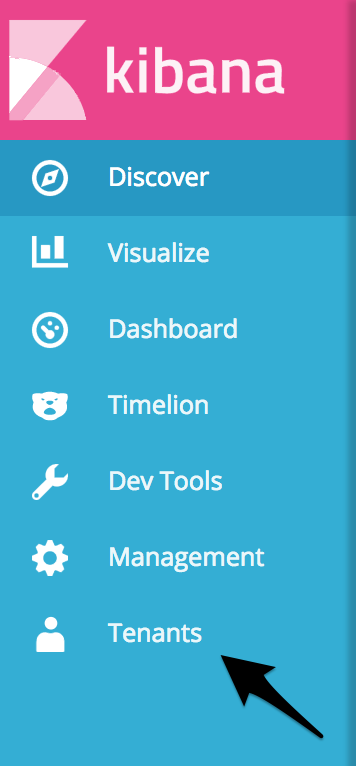
If the plugin is installed correctly, you will see a new entry in the left navigation panel called “Tenants”:
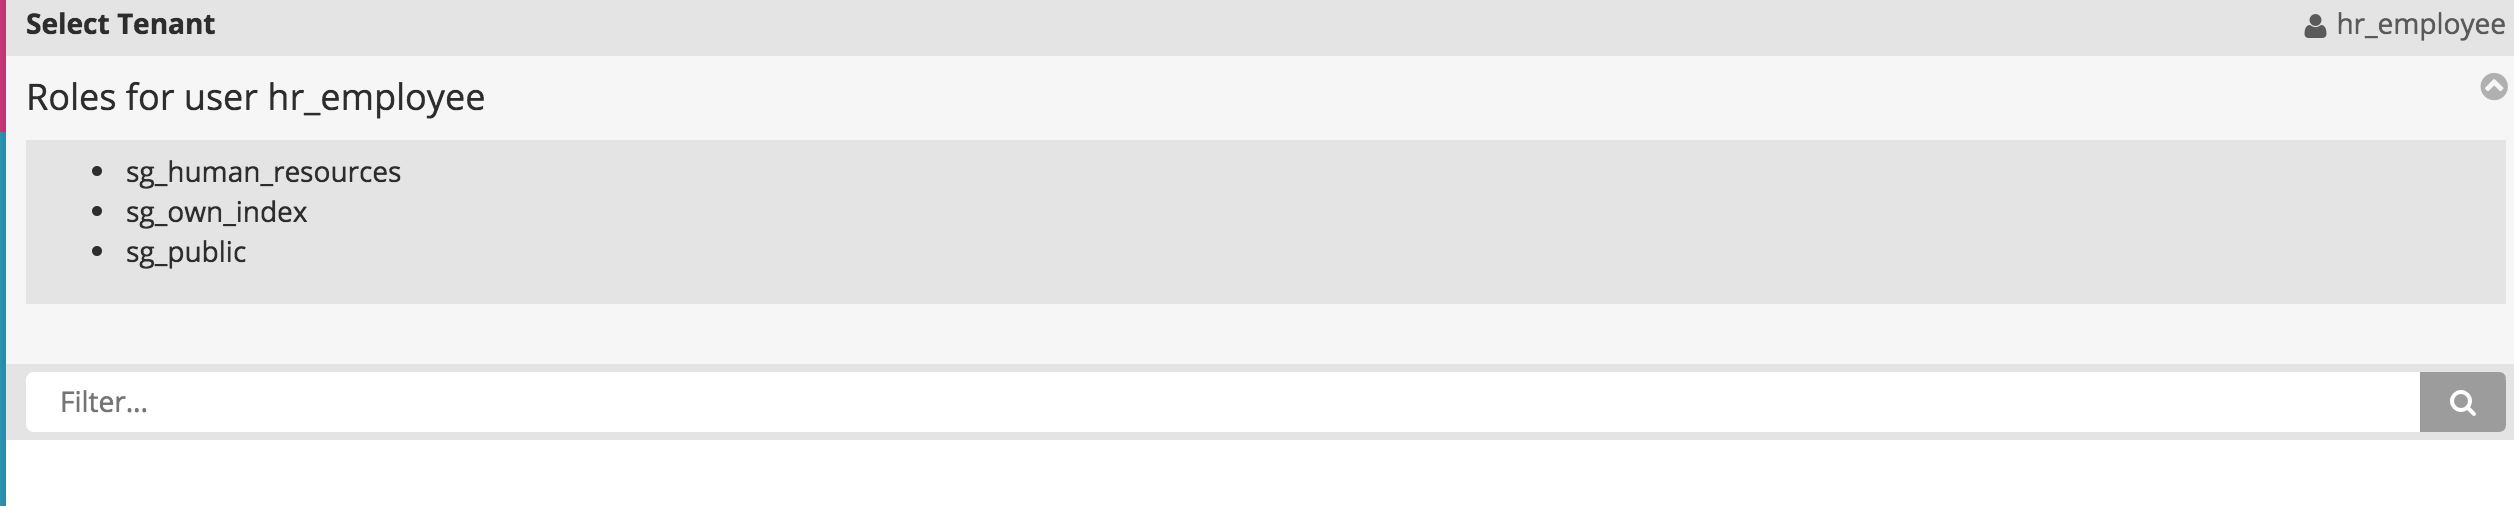
After clicking it, you will see all available tenants for the currently logged in user. Select the tenant you want to work with:
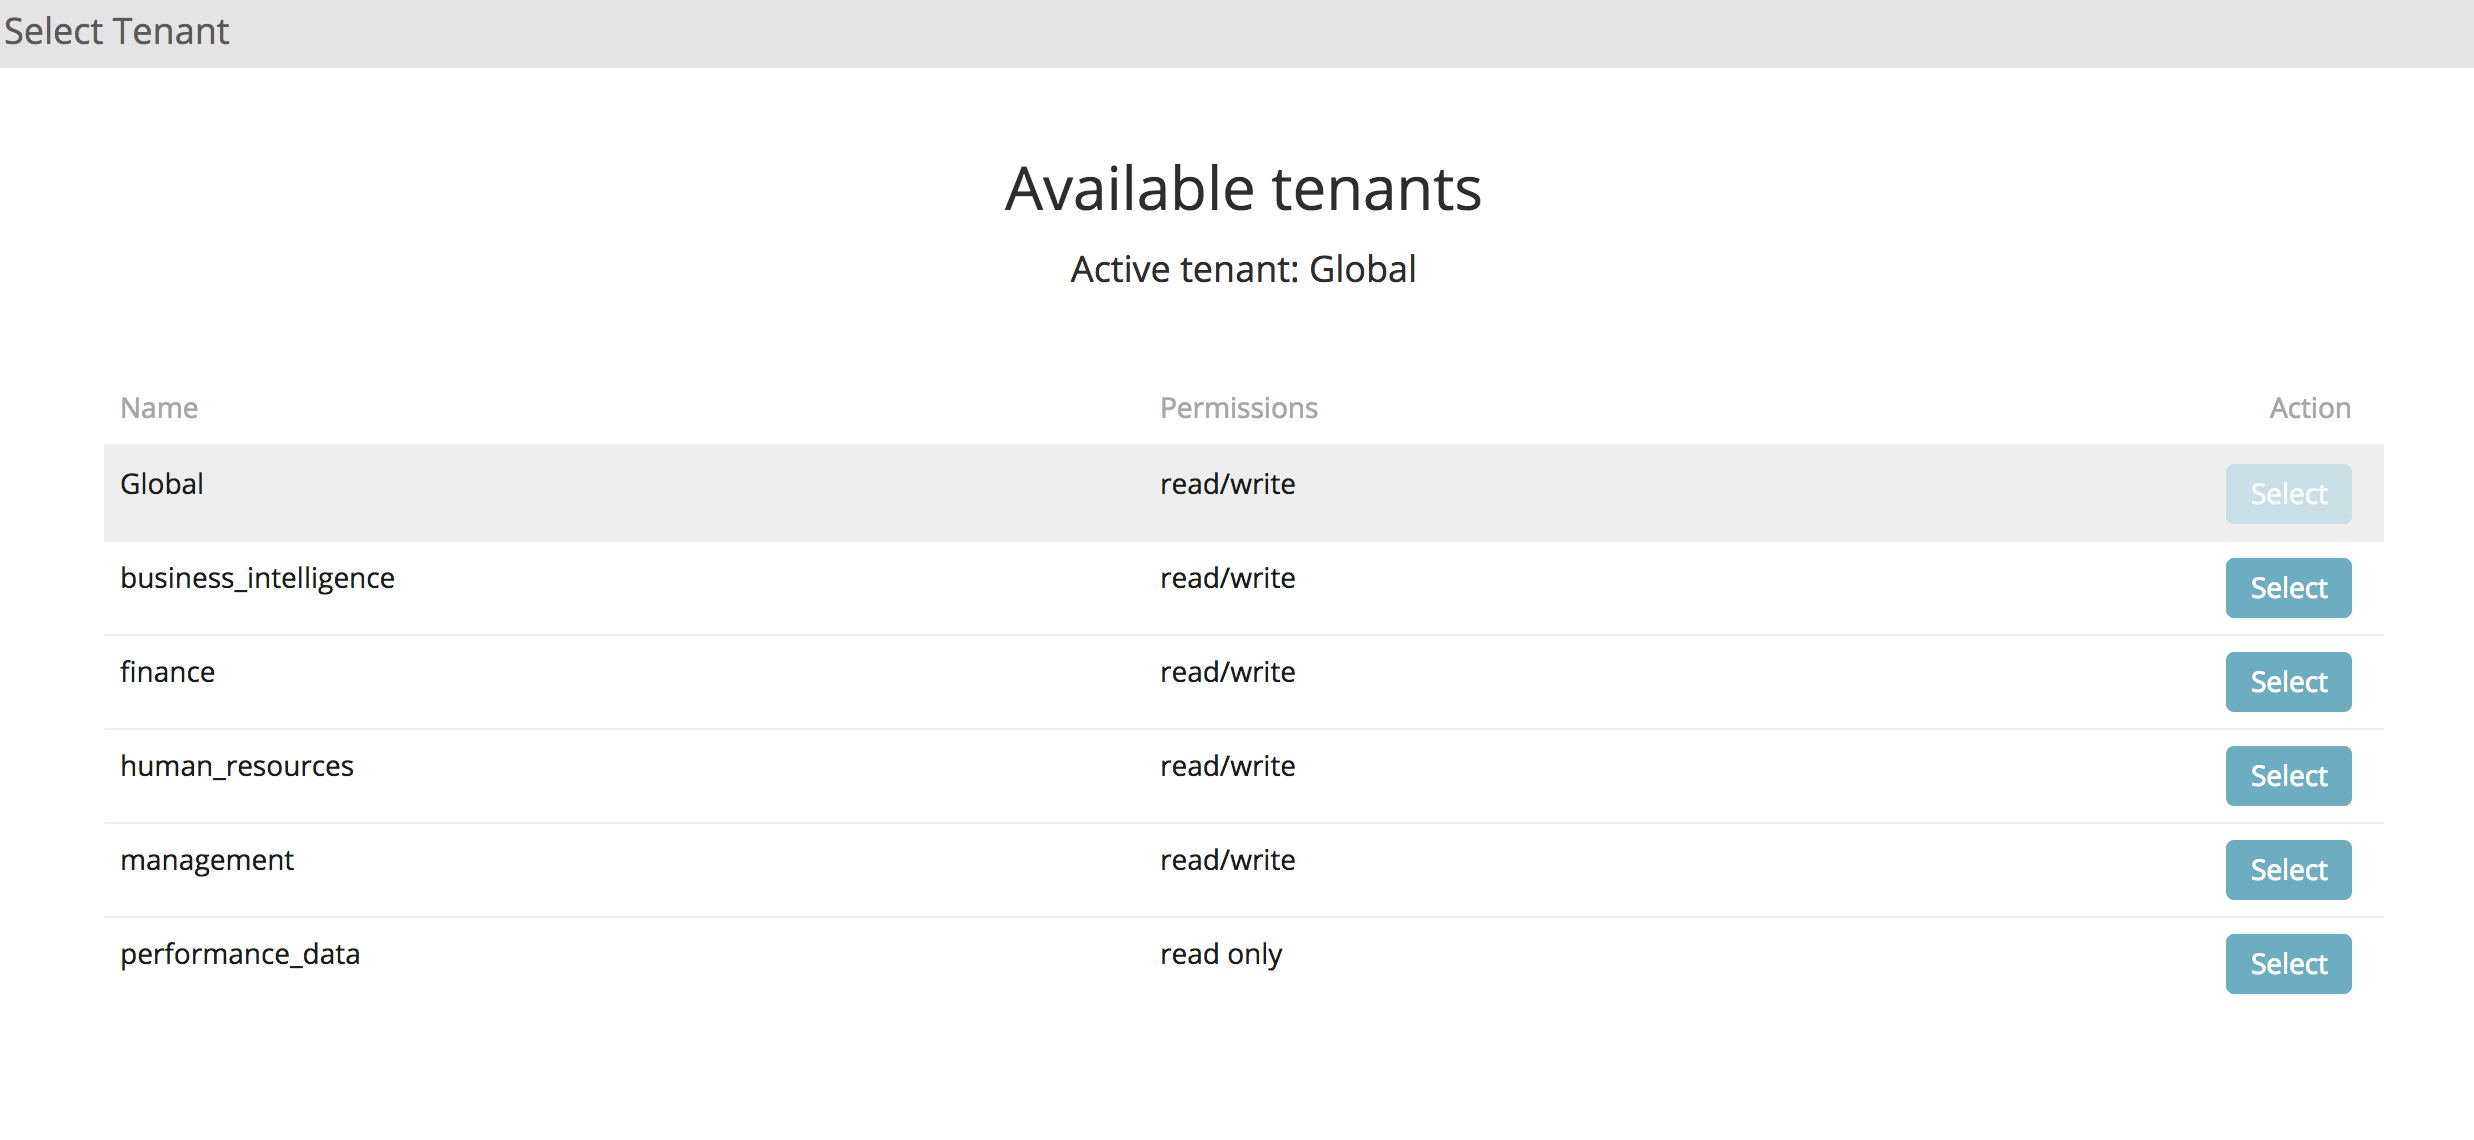
All saved objects will be placed in the selected tenant. Search Guard remembers the last selected tenant per user. So you do not need to change it every time you log in.
Under the hood: Index rewriting, Snapshot & Restore
In a plain vanilla Kibana installation, all saved objects are stored in one global index. Search Guard maintains separate indices for each tenant.
For example, if your Kibana index is called “.kibana”, and the currently selected tenant is “human_resources”, Search Guard will create a new index called something like “.kibana_1592542611_humanresources”, and places saved objects will in this index.
The structure of the index name for a regular tenant is:
<kibana index name>_<tenant hashcode>_<tenant name>
There are two default tenants in additions, Global and Private. The structure of the index name for the Private tenants is:
<kibana index name>_<username hashcode>_<username>
The structure of the index name for the Global tenants is:
<kibana index name>
Search Guard automatically makes sure that the index names do not contain any illegal characters. Search Guard also checks the user’s permissions for the selected tenant index. You do not need to configure anything special in sg_roles.yml, apart from the standard permissions for the Kibana index. See Using Search Guard with Kibana for further information.
If you use snapshot / restore, you need to include all tenant indices, otherwise you will loose data!
In order to include all Kibana indices in your backup / snapshot, the easiest way is to simply use wildcards:
<kibana index name>*
Fixing curl issues
If you experience problems with curl commands see Fixing curl first before reporting any issues.
Additional resources